Previous installments of this blog series have shown us why archeology is done and how archeologists know where to look for archeological sites. Part 2 also introduced us to archeological field investigation, specifically pedestrian survey, non-invasive geophysical survey, and subsurface testing—techniques used to identify the spatial distribution of artifacts and features on the surface and below ground and determine their historical significance. But once a site is identified and its historic significance is considered, what happens next?
Mitigation
In most cases where state and federal cultural resources laws and regulations apply, no additional fieldwork is needed beyond this point, as projects are usually able to be altered or redesigned to avoid the archeological site. Preservation in place through avoidance is always the preferred course of action. However, in cases where a site is determined to be historically significant—considered Eligible to be listed in the National Register of Historic Places—and when a project cannot avoid and will adversely affect an archeological site, more extensive data collection is needed in the form of site mitigation, a process to comprehensively document and preserve information about the past that is connected to that site. Mitigation allows information about a site to be collected, saved, and reported on for the benefit of the public and future generations.
Determining the appropriate type and level of mitigation can be a difficult process that both accounts for the specific project needs and impacts (i.e., how much of a site will be destroyed), as well as the desired outcomes for the local community and other consulting parties. For archeological sites, data recovery—excavating an archeological site to gather as much information as possible before a project alters or destroys the site—is the most common form of mitigation. But other forms of mitigation, such as the development of interpretive signage, researching similar nearby sites and listing them in the National Register of Historic Places, protecting a site by burying it under fill, or the development of regional cultural synthesis, can be completed by using the resources that would have otherwise gone to data recovery.
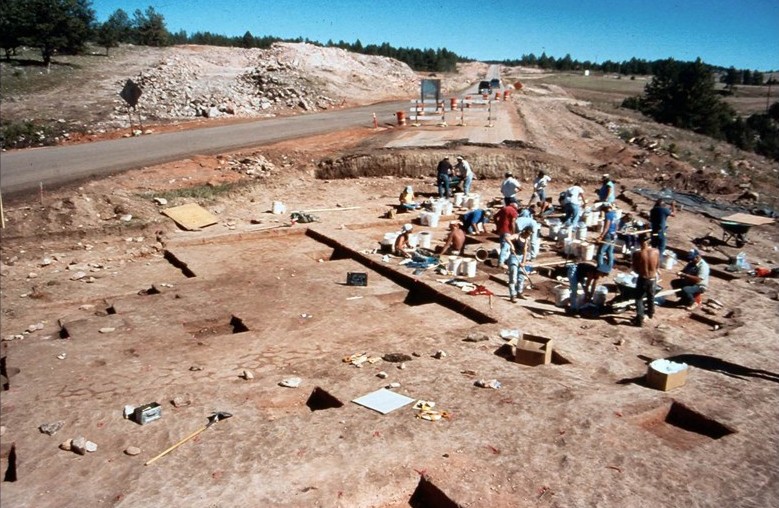
A crew of archeologists completes site mitigation via data recovery ahead of new highway construction.
Whatever form of mitigation is decided upon, the agency leading the project must work with all relevant consulting parties, including, among others, the State Historic Preservation Office, Tribal Historic Preservation Offices, and the Advisory Council on Historic Preservation (ACHP), to develop a memorandum of agreement that clarifies resolution of the project’s adverse effects. To learn more about mitigation and the appropriate treatment of adverse effects, the ACHP provides an extensive list of FAQs.
Excavation Tools and Techniques
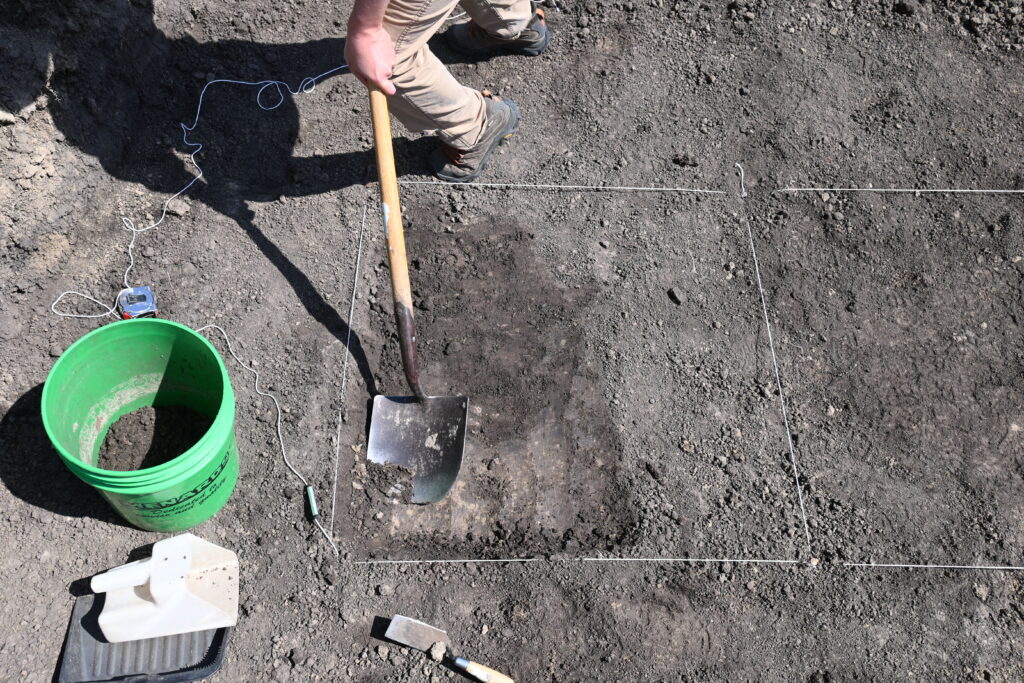
One primary issue with data recovery is, of course, that archeologists don’t know what’s going to turn up during large-scale excavations until the excavation is conducted. Despite best efforts at reviewing information about existing sites in the vicinity, subsurface testing, and identifying areas of interest using non-invasive techniques, until the shovel hits the ground, we won’t know. Because of this, and because of the destructive nature of archeology as a practice, archeologists take great care in how they excavate an archeological site. From the initial setup of excavation units, through mechanical or hand-excavation and documentation of artifacts in features, archeologists thoroughly document every step of the process through field notes, photographs, GPS data, hand-drawn maps, and completed forms of various types.
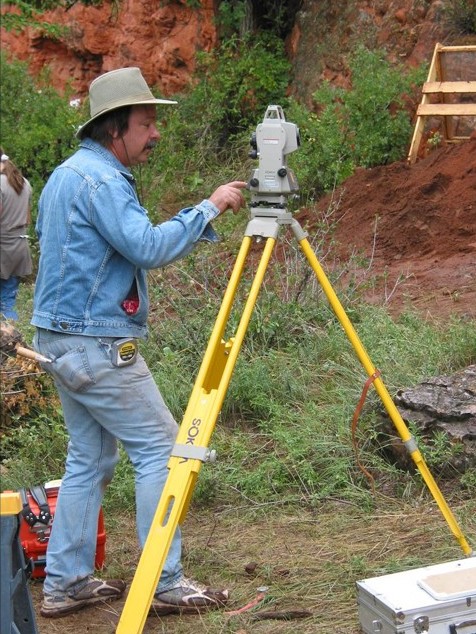
An archeologist documents spatial information using a Total Station set up on a permanent site datum.
Based on the results gathered from initial pedestrian survey, limited subsurface testing, evaluative excavations, and/or non-invasive geophysical survey, archeologists tend to have a solid understanding of the distributions of artifacts and features, both above and below ground. The information gathered during these steps of the process inform the archeologists about where to establish a grid across the site. Excavation grids are used to maintain control of the spatial distribution of archeological material across a site. A site datum—a fixed location outside of the grid, often in an area outside of the site that can be permanently maintained—is generally established to build the grid off. The datum can also be used as a data collection point where a Total Station or a GPS base station may be set up to document spatial (UTM or latitude-longitude coordinates) and elevation (height or depth from a fixed point) information.

Example excavation grid showing numerical coordinates based on north and east directions.
Grids are typically made of 1-meter (3-feet) square units oriented across either an entire site or specific areas of interest to focus excavation efforts on. Numerical directional coordinates are assigned to the corner of each grid unit; most often, the excavation unit is referred to as the number assigned to its southwest corner. Then, during excavation, all artifacts, paperwork, photographs, and other data can be tied to that specific excavation unit. Corners of the units are marked with nails or stakes, then the perimeter of the unit is bound with twine to visually represent the square unit.
NSHS archeologists examining the mechanically stripped topsoil at the Sharp Homestead site in 2012.
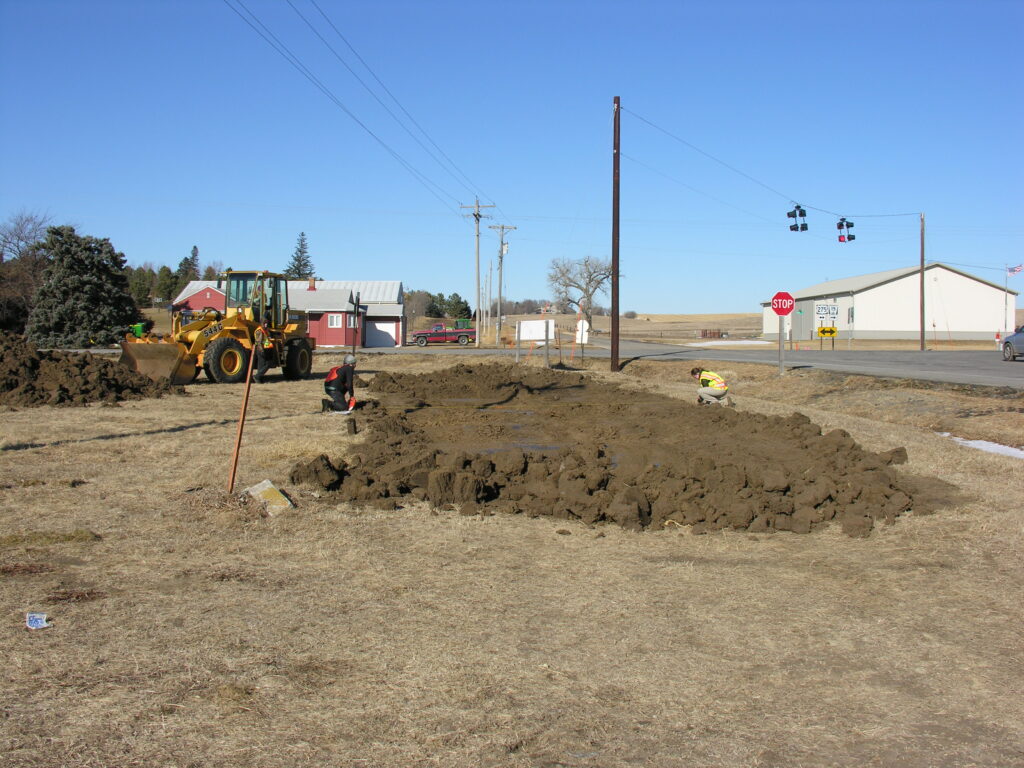
With a grid established, excavation can begin. Mitigative excavations may be completed entirely by hand or with the assistance of heavy equipment like a backhoe or belly scraper. Using machinery can quickly remove portions of the site that have no cultural material, as well as expose large areas that may contain buried cultural features, like hearths, foundations, or soil staining indicative of cultural activity. Trenches may also be excavated to explore soil layers that can provide additional information about how a site was formed, used, or impacted. This can save time—and the backs of the archeologists!—but must be employed with extra caution because of the possibility of plowing right through important archeological information.
Hand excavation is most often completed with different types of shovels, usually through a process called shovel skimming. Shovel skimming involves carefully removing thin layers of sediment by pushing the shovel at a low angle across the surface of the unit. While slow, this approach offers greater control and allows the archeologist to stop as soon as an artifact or feature is encountered. Whenever possible during excavation, archeologists prefer to leave items in place—in Latin, in situ—so their position, context, and relationship to other artifacts or features can be observed and documented. As archeologists expose artifacts or features, or when they need to clean up the floor or walls of their units, they will switch to smaller hand tools like trowels, spoons, brushes, and scoops to exercise additional care in removing sediment.
Demonstration of the shovel skimming technique. Note the 1-meter square units bound in string and other tools at the ready.
No matter what the excavation technique, archeologists dig carefully and methodically, either removing sediment in arbitrary levels of a specific depth (e.g., 5 to 10 centimeters) at a time, or by changes in soil color and texture. This approach allows archeologists to better understand the vertical and horizontal distribution of archeological materials at the site. Different cultural components or occupation periods may be separated by thin layers of sterile soil that would be otherwise unnoticed if deliberate excavation care is not taken. Each excavation level is documented separately, with photographs taken, maps drawn, GPS data collected, and paperwork completed. These data are then compiled during analysis to tell a complete story about the archeological site and the activities that occurred there.
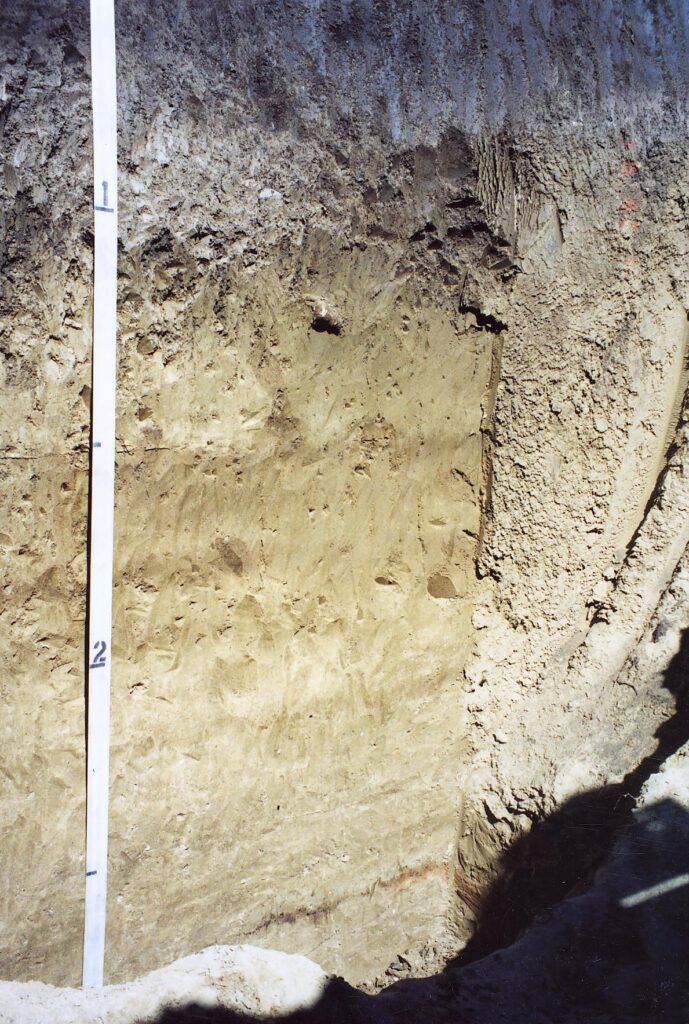
Wall of an excavated unit showing layers of different soil colors and textures.
Excavated sediment is generally then passed through screens—by shaking, pushing, grinding, or even with the aid of water—of aluminum hardware mesh to separate soil, grass, bugs, and other non-cultural items from any artifacts present. Depending on project goals or needs, and the types of archeological materials expected, the size of the mesh will vary; 1/4-inch mesh is most used, though 1/8-inch or smaller may also be used. Artifacts recovered either in situ or in the screen are placed in bags labeled with site information, such as the excavation unit number, level, depth, and date. Samples of sediment from units or from archeological features may also be collected without screening to conduct more fine-grain analysis in the lab, such as looking for pollen, phytoliths, or seeds, or to date the sediment by radiocarbon dating.
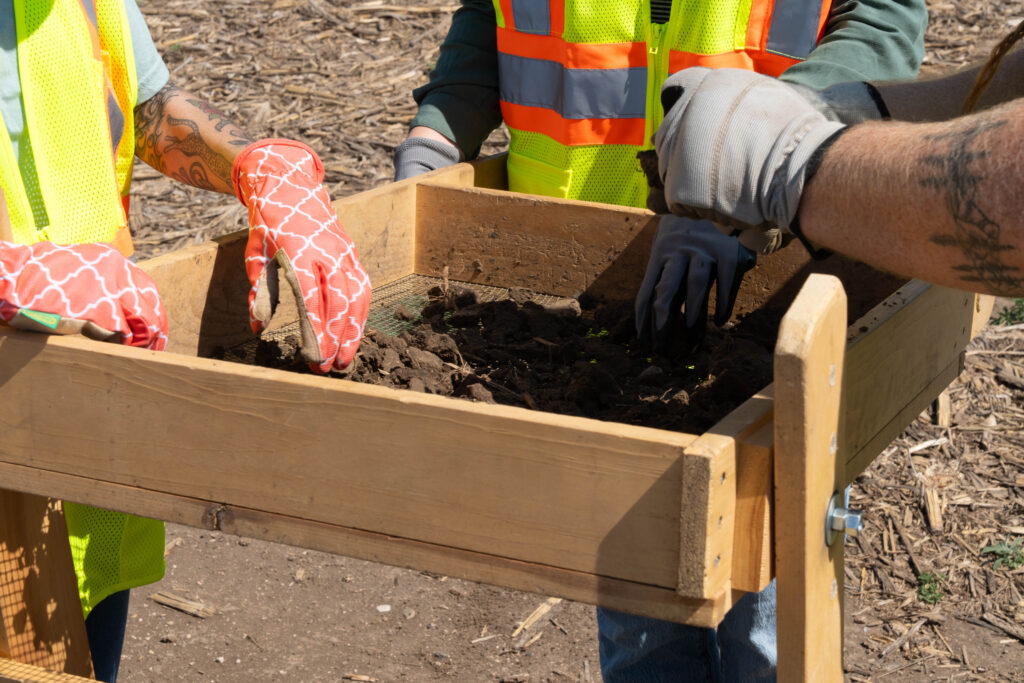
NSHS archeologists screening sediment through 1/4-inch hardware mesh at the Sharp Homestead.
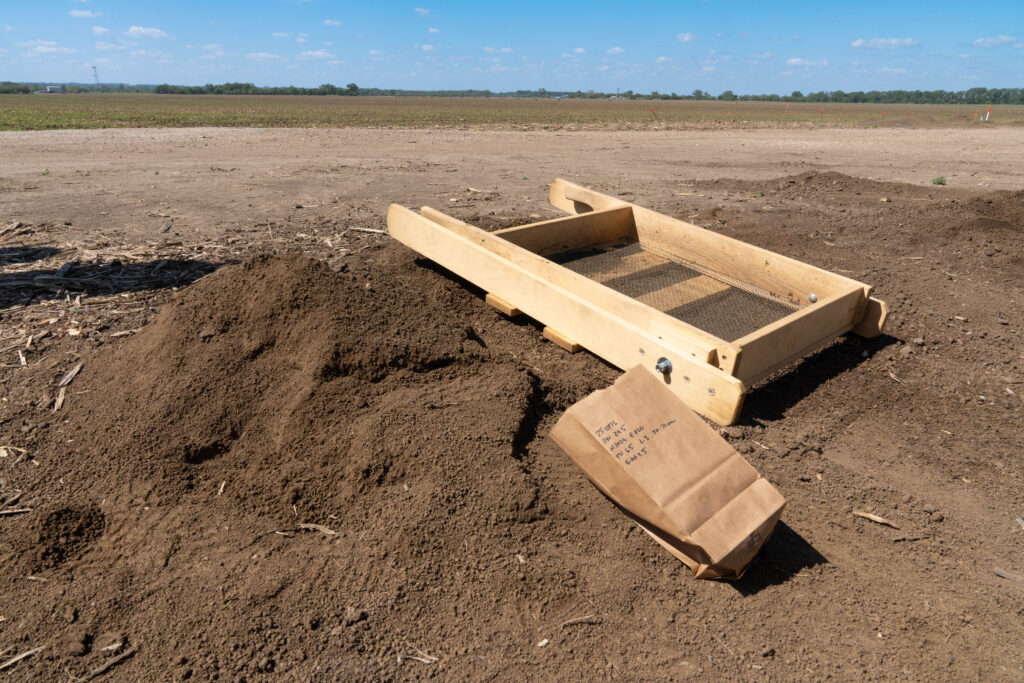
Screened sediment from the Sharp Homestead excavation.
But how deep will these excavations occur? Archeologists will halt excavation depth for a number of reasons. Sterile sediment may be encountered at several levels below the deepest artifact or feature identified. Bedrock, the water table, or other obstructions may prevent further excavation. Or the depth of impact from the planned project may indicate that deeper excavation is not needed. In some cases, such as along dynamic river environments or areas covered by deep wind-blown sediment deposits, cultural material may continue to be found many feet below the surface, and archeologists have to halt excavation because it’s simply not safe to dig any deeper.

Stratified archeological site excavation near the Missouri River in Knox County.
Once excavation is complete, maps are drawn, GPS data is collected, and photos are taken, clean up can begin. First, the nails and string defining excavation units are removed. Then, depending on the project, units may be backfilled with the screened dirt or left open (such as when extensive ground-disturbing activities will occur within the site area). Sometimes, archeologists place plastic or other markers, such as coins from the year of excavation, at the bottom of excavation areas in the event that future excavations occur at the site. Then it’s on to the lab for cleaning, processing, cataloging, and analyzing the excavated materials!
The Sharp Homestead
With these tools and techniques in mind, we can turn back to the Sharp Homestead project in Stanton County. Project plans indicated that the site could not be avoided by the planned Highway 275 expansion. It was determined that data recovery via large-scale excavation would be the most appropriate form of mitigation for the adverse effects on the site, as most of the site would be impacted by road construction in one way or another.
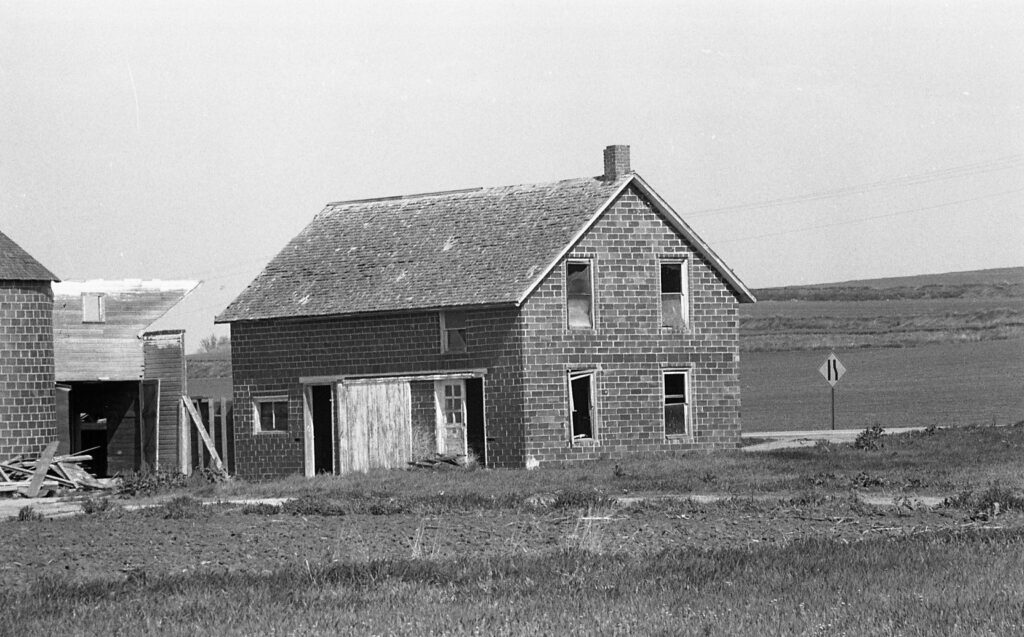
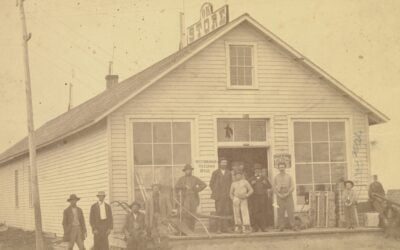
Photograph showing a standing building on the Sharp Homestead property in 1988.
How were excavation areas selected?
When the site was surveyed early in the process, it was clear that the scatter of artifacts was much larger than the farmstead that was visible on a 1940 air photo. Also, there were no concentrations of artifacts that could be used to pinpoint the location of former buildings. Both of these complications were due to the site being repeatedly tilled for farming. The geophysical survey conducted in 2019 allowed several large anomalies to be located. The five most promising geophysical anomalies were selected for the initial tests. During fieldwork, excavation expanded beyond these initial five areas to explore additional anomalies.
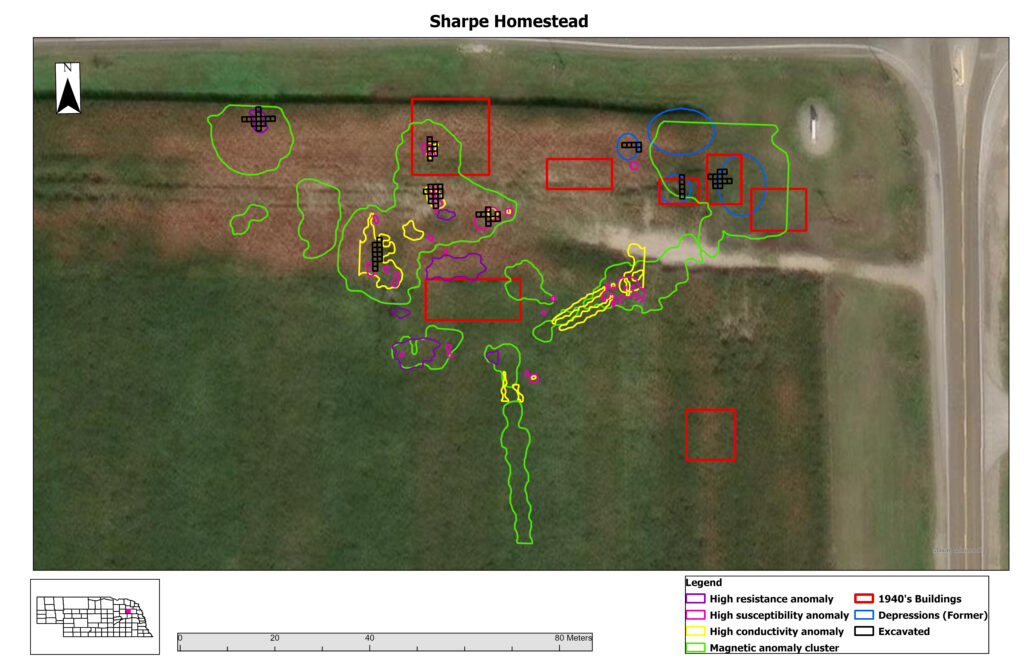
Map of the Sharp Homestead site area showing locations of geophysical anomalies and excavation grid areas.
What were the excavation techniques used at the Sharp Homestead?
When excavation became imminent at Sharp Homestead, a grid of 1-meter squares, historic aerial photos, geophysical data, construction information, and previous archeological information were all georeferenced onto the modern aerial image of the site to build a comprehensive site map. Using this map containing all the information known about the site was used to select the specific excavation areas. Once that was done, all the logistical details were finalized: travel, equipment, hotel, amenities, utility location, and a host of other minor details. After that, nothing was left to do but start digging.
The Highway Archeology Program team laid out the excavation grid using handheld GPS equipment, marking unit corners with nails and bounding unit perimeters with string. Excavation was done with shovels, trowels, brushes, and scoops. Each unit was excavated in 10-centimeter levels; excavation depth varied across the site, with some of the deepest units excavated to 2 meters (6+ feet) below the surface!
A handful of features were identified during excavation, including a pit filled with burned building remains and a brick-topped cistern. Those features, along with certain artifacts found during excavation, were mapped using handheld GPS equipment and photographed.
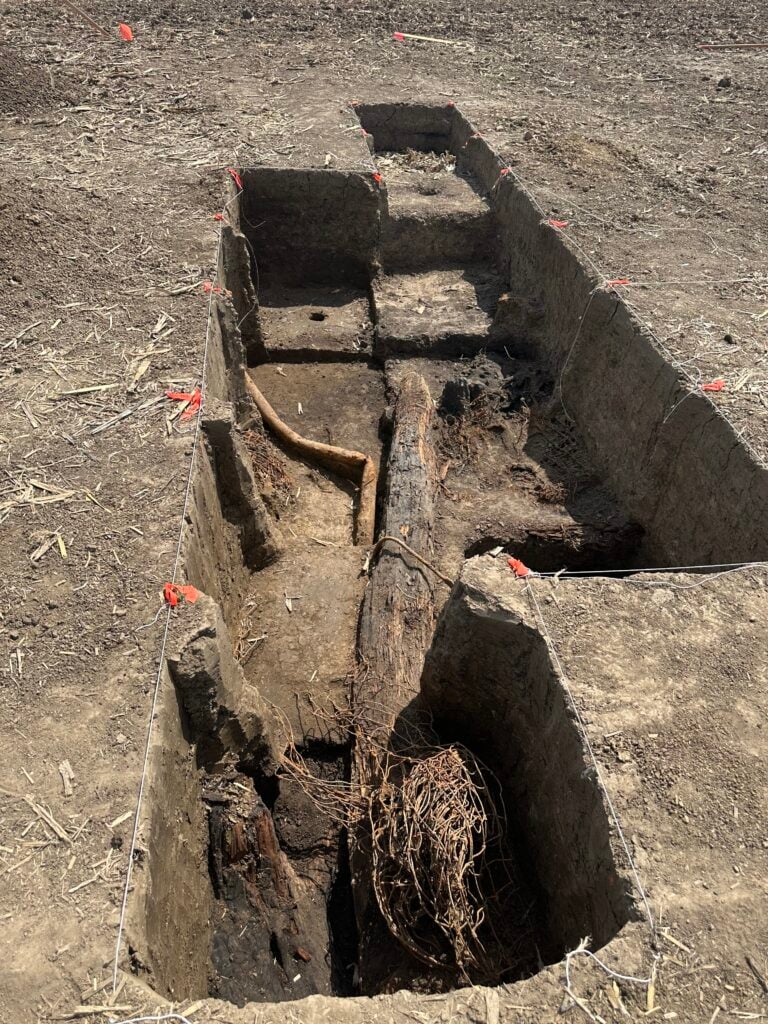
Portion of the pit feature containing burned building remains uncovered at the Sharp Homestead.
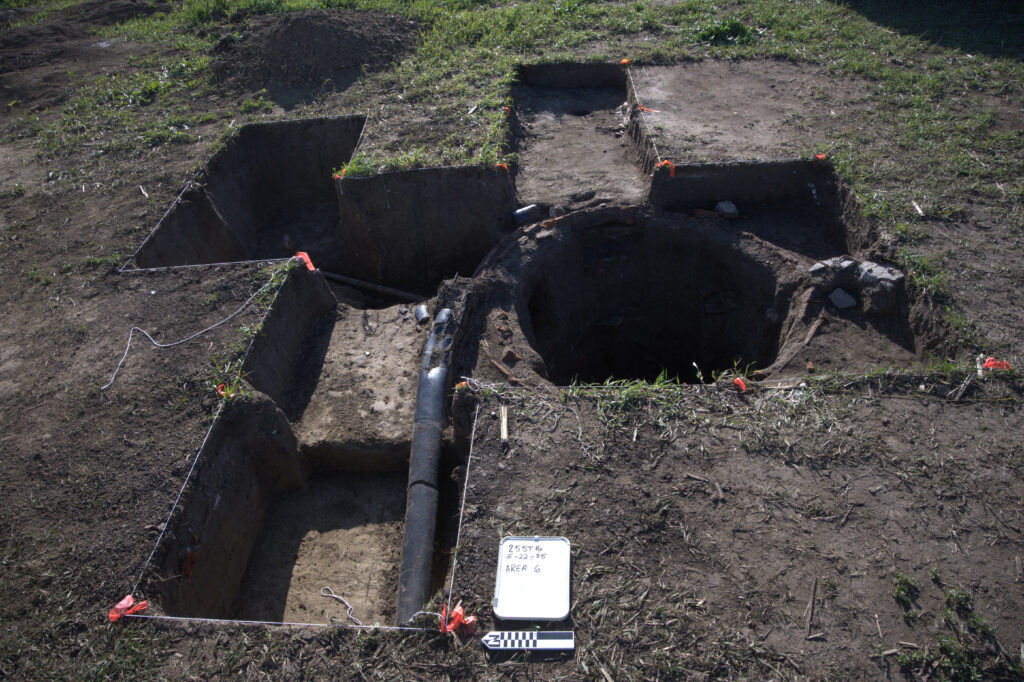
Brick-topped cistern excavated at the Sharp Homestead.
How much area was excavated, and what challenges were encountered during excavation?
By the time work was completed, 75 1-meter squares were excavated, totaling about 40 cubic meters. That equals 60,000 Runzas, by weight, or 112,500 cans of your favorite beverage, by volume. During the seven weeks of work, the team encountered air temperatures ranging from 26 to 90 degrees and wind speeds of up to 50 mph. The team broke 15 screens and a shovel during these excavation efforts due to dense, compact soil. Water was dumped in excavation units regularly to soften the sediment.
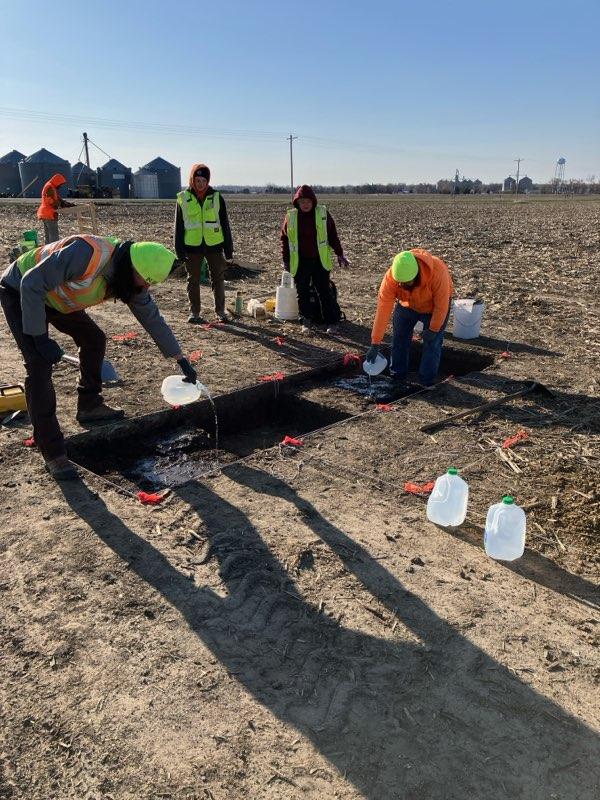
NSHS archeologists dumping water into excavation units at the Sharp Homestead to soften the dirt.
What did excavation tell us about the site? Did it match our hypotheses about what was going on there?
When the excavation began, two things became clear. First, the results of the geophysical techniques did not always align with subsurface features such as cellars, foundation remains, or trash pits. Two of the five areas initially selected did not contain any substantial archeological materials. Also, it was clear that the farmstead had been actively dismantled to facilitate farming. At two locations, large holes were dug with building remains pushed in, and in one instance, those remains had been set on fire.
There was one exception to the results; however, a mostly intact brick-topped cistern was located. But even here, it was clear that parts of a structure that included asphalt shingles and plaster with wallpaper had been tossed into the cistern. Our expectations were not met as we initially thought more intact subsurface features would be found.
What’s next?
Once the artifacts have been cleaned, cataloged, and curated, the archeologists at NSHS will write a comprehensive report. The purpose of a report of this kind is to tell the story of how the occupants of the site lived in the past, as no other record is left. Additionally, public presentations about the project will be made available.
(Posted September 26, 2025)